Hive DashCam F1
f1
Updated
2 days ago
, by boAt Knowledge Base
Hive Dashcam F1
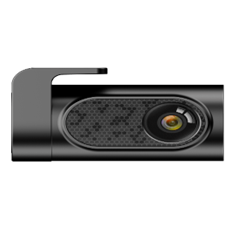
The boAt Hive Dashcam F1 is an on-road safety companion featuring dual-recording support for both front and rear cameras.
Specifications
Model | Hive Dashcam F1 |
LCD Size | 2.4-inch screen |
Aperture | F= 1.8 |
Sensor | SONY IMX335 |
Video Resolution | 4K 3840×2160 25FPS + 1080P 25FPS 2K 2560×1440 30FPS + 1080P 30FPS 1K 1920×1080 60FPS + 1080P 30FPS 1K 1920×1080 30FPS + 1080P 30FPS |
GPS | Built-in |
Memory Card | Supports Up to 512GB (Class 10 U3 Speed) |
Video Encoding | Mp4. Default H.264; 4K+1080P uses H.265 |
MIC | Support |
Speaker | Support |
USB Port | 1. Files transfer (USB cable not included) 2. Power supply |
Working Temperature | -20°C to 70°C |
Installation FAQs
Troubleshooting FAQs
General FAQs
Power On: Short press the Power button; indicator light turns on.
Power Off: Long press the Power button for ~3 seconds; indicator turns off.
Auto Power: Dashcam powers on/off automatically with vehicle ignition.
To insert: Make sure the camera is turned OFF first. Align the gold contacts of the card facing the lens side (front of the camera). Insert the card halfway, then gently push it inward until it clicks and locks into place.
To remove: Gently push its edge inward until it clicks and then pops out, then simply pull it out of the slot.
Note:
When the Micro SD card is removed, the dashcam appears OFFLINE, and recording will stop.
Always turn device OFF before inserting/removing.
It supports up to 512GB U3 Class 10 microSD card.
The formatting recommended every 3–6 months.
Key | Function | Instructions |
Micro SD Card Slot | Recording | The golden side of the micro SD card faces the lens side, then insert. |
Power Button | Turn On / Turn Off / Take Photo |
|
R | Reset | When the device crashes, short press here to reboot. |
M (Menu) |
|
|
▲ | Up | |
|
|
|
▼ | Down |
|
OK |
|
|
USB-C Port | Charging USB Storage |
|
AV IN | Rear Camera Port | Used to connect the rear camera to the device’s mainboard, allows the video data transfer to thecamera. |
USB-C Port: Charging & data transfer.
AV/IN Input: Connects rear camera for dual recording.
microSD Card Slot: Storage (supports up to 512GB, U3 Class 10).
Microphone & Speaker: Audio recording and playback.
Red:
Red (steady): External power connected / Recording stopped.
Red (flashing): Normal recording in progress.
Red + Green flashing: Firmware upgrade in progress.
Green:
Red light and green light flash rapidly simultaneously during the firmware upgrading.
Screen: 2.4” LCD screen (6.09 cm).
Functions: Live view during recording; Playback of saved footage; Menu navigation.
On-Screen Icons: GPS status, WDR, Time-lapse, Recording mode, Loop recording, Motion detection, Audio on/off, G-Sensor status, Date/Time, Resolution, SD card indicator.
This feature lets you:
Pair your dashcam with your smartphone wirelessly.
View, download, and share recordings easily.
The Wi-Fi range is maximum 10 ft, assuming there are no obstacles.
Just like your home Wi-Fi doesn’t work outside the house, this dashcam’s Wi-Fi is local and limited to proximity.
The dashcam provides Normal video recording.
It includes Parking Mode options: Time-Lapse, Collision Detection, and Normal Recording.
Video Mode: Continuous video recording.
Photo Mode: Capture still images.
Playback Mode: View saved videos/photos.
Mode Switching: Long press Menu (M) button (2 sec) to cycle Video → Photo → Playback.
Install 3-lead hardwire kit (sold separately).
Enable Parking Mode + G-Sensor in settings.
Adjust sensitivity.
On the device:
Ensure the dashcam is powered ON.
Insert a pin or paperclip into the Reset pinhole (R button) and press gently for 2–3 seconds.
Release and allow the dashcam to reboot.
Factory Reset: Available under system settings → Default Setting
Firmware Update: Triggered when update files are loaded via micro-SD card; LEDs flash red + green.
Yes. Connect the dashcam to your phone via Wi-Fi using the boAt HiveCam app to preview, download, or manage recordings.
No. The Dashcam does not support cloud/remote streaming.
It works only within 10 ft via Wi-Fi
Long press to switch between front, rear, and picture-in-picture modes.
Go to Profile > Account Management, from here, you can access the following options:
Reset Password
Delete Account
Log Out
Navigate to Profile > Clear Cache, select Clear App Cache, and tap Confirm to proceed.
This clears temporary app data to improve performance and resolve minor app issues without deleting your account or recordings.
This option allows users to report app issues, share feedback, and help improve app performance.
Go to Profile > Feedback.
Enter the issue details (up to 150 characters), upload up to 2 photos or 1 video (optional), add your phone number or email, Device Log File (optional), and App log file (optional; can be enabled or disabled).
Tap Confirm to submit feedback.
You may face issues like photo not getting captured or any other issues while using the app. You can try to:
Attempt Formatting the SD Card
Restart the device
Go to the Dashcam Preview interface.
Please STOP recording first, then press the ‘Dashcam Albums’ to get photos, videos, and emergency files (event tab).
Select the media files to download onto your device. Go to Event tab to download the emergency event videos.
Press the download icon to save the media files. Trim the video duration as per your requirement, then wait for the download to complete.
Then you can find these downloaded media files in APP original interface menu named ‘Downloaded Files’.
SR Synthesis allows you to view route details, steering wheel direction, vehicle acceleration, and vehicle speed as on-screen data stamps on downloaded videos.
Steps to Enable SR Synthesis:
Stop the ongoing recording.
Go to Downloaded Files.
Open the Videos / Event folder.
Tap SR Synthesis to process the video with SR data.
Open SR / Close SR to view/hide the video with SR data overlays.
Note: Since E1 doesn’t have in-built GPS functionality so SR Synthesis video won’t work as expected.
Do not connect/disconnect rear camera while dashcam is on.
Always use recommended charger; low power may cause reboot/flickering.
Use only Class 10 U3 microSD; avoid counterfeit/damaged cards.
Never remove SD card while recording.
Keep vents unobstructed to prevent overheating.
Download the boAt HiveCam app on your device using the QR code. The app is available on both:
App Store (for iOS 12.0+ and above)
Google Play Store (for Android 7.0+ and above)

Step 1: Downloading the boAt HiveCam app on your Device
Download the boAt HiveCam app on your device using the QR code. The app is available on both:
App Store (for iOS 12.0+ and above)
Google Play Store (for Android 7.0+ and above)

Step 2: Register or Log In
Open the HiveCam app: A pop-up message about GPS usage & BT enabling appears, 'Tap Confirm to continue.'
On the login screen: Enter your mobile number and password and agree to the Terms of Service and Privacy Policy.
Finally, tap Login. OR
Skip Login (Optional): If you're unable to receive the verification code or prefer not to register, tap Skip Login in the top right corner. After skipping login, tap Add Device and follow the prompts to connect to your dashcam. The app will automatically scan for available devices. However, this is not recommended, as skipping login will not help you register for warranty and further issue resolution.
Note:
During the initial launch, the boAt HiveCam app will request the following permissions:
Location Access: Needed to retrieve the Wi-Fi name for dashcam pairing. You can select precise or approximate location.
Nearby Devices: Required to detect and connect with your dashcam.
Photos & Media Access: Needed to save and view recordings from the dashcam.
Notifications: The app will prompt you to enable notifications for alerts.
Grant these permissions as prompted to ensure full functionality of the app.

Step 3: Connecting Hive Dashcam M1 via Wi-Fi
Hive Dashcam M1 is a built-in Wi-Fi dash cam. Open the app and tap on the product to proceed.
Make sure that the dashcam is connected to a power supply and turned ON.

Step 4: Connect to Dashcam Wi-Fi
On your phone, go to Settings > Wi-Fi.
Manually select the network named ‘boAt-Hive_Dashcam-M1_XXXXXX (your device’s unique ID).
Enter the default password: 12345678.
Note: The hotspot is without internet and might disconnect. Please select the "Stay Connected even without internet" option when asked by the Settings popup.
Once connected, return to the app and tap ‘Next’.

Step 5: Finalize Connection & Preview
After tapping ‘Next’, the app will display the connected dashcam model.
Tap on the dashcam icon to open the Live Video Preview interface.
Now you can view the video currently being recorded in real-time by connecting your smartphone to the dashcam via Wi-Fi Direct.
Please STOP recording first, then press the ‘Device Album’ to get photos, videos, and emergency files.
Note: To ensure connectivity, please always connect to a power supply.
Location Access: Needed to retrieve the Wi-Fi name for dashcam pairing. You can select precise or approximate location.
Nearby Devices: Required to detect and connect with your dashcam.
Photos & Media Access: Needed to save and view recordings from the dashcam.
Notifications: The app will prompt you to enable notifications for alerts.
Camera Modes: Videos, Photo & Playback
Switching between the modes
Resolution
Loop Recording
Time-Lapse Record
Record Audio
Stamp
Video Recording G-Sensor
Parking Mode G-Sensor
24-Hour Auto Parking Mode
Hide Status Icons
Speed Unit
Live Speed
Rotate Front Video
Camera Modes: The Hive Dash Cam features three camera modes for different functionalities:
Video Mode: Used for recording continuous video footage while driving.
Photo Mode: Allows you to capture still images manually from the dashcam.
Playback Mode: Enables you to review saved videos and photos directly on the dashcam screen.
Switching between the modes: Switch between camera modes to record videos, take photos, or view playback. Follow the steps below:
Stop Recording: Press the OK button to stop any ongoing recording.
Photo Mode to Playback Mode: Press and hold the Menu (M) button again for 2 seconds to switch from Photo Mode to Playback Mode.
Video Mode to Photo Mode: Press and hold the Menu (M) button for 2 seconds to switch from Video Mode to Photo Mode.
Note: Continue pressing the Menu (M) button for 2 seconds to cycle through the modes in sequence.
Select your preferred video resolution and frame rate (fps) for the front camera. Higher resolution and fps provide smoother video quality; however, they consume more storage space. Refer to the table below for front and rear camera resolution combinations:
Front Camera Resolution | Rear Camera Resolution |
2160P (25FPS) | 1080P |
1440P (30FPS) | 1080P |
1080P (60FPS) | 1080P |
1080P (30FPS) | 1080P |
Note: Video resolution settings apply only to the front camera.
Loop recording allows the dashcam to continuously capture video by overwriting the oldest files.
When the memory card is full, the dashcam automatically overwrites the oldest files to continue recording.
Set the loop recording duration to Off, 1 minute (default), 2 minutes, or 3 minutes based on your preference.
Note: Keep Loop Recording On to ensure continuous video capture without manual file deletion.
Time-lapse mode is ideal for long-duration monitoring, especially when the vehicle is parked. It helps conserve storage space and power by capturing fewer frames per second. The recorded footage is played back at high speed, allowing you to view longer periods in a shorter video. When enabled, the dashcam operates for extended periods while minimising file size.The playback will appear in fast-forward motion.
Default Setting: Off
Available Options: Off, 4 images/second, 2 images/second, 1 image/second (1-minute video covers 30 minutes of real time), and 1 image every 2 seconds
Note: Enable only when needed, as standard recordings offer more detail.
This feature allows the dashcam to capture ambient sound along with video recordings. When enabled, conversations and background noises inside the vehicle will be recorded.
Default Setting: On
Available Options: On (records sound), Off (video is silent)
Stamp allows key information to be displayed on recorded video footage for reference or legal purposes. When enabled, selected data will appear as an overlay on the video.
Available Options: Logo, Date/Time, Speed, Model, GPS Coordinates
Default Setting: On
You can choose to display any or all of the available stamp elements as per your preference.
This setting determines the dashcam's sensitivity to impacts. When a collision or sudden movement is detected, the dashcam saves the footage as an event file to prevent it from being overwritten.
Available Options: 0 (Off), 1–9
Default Setting: 5 (Medium)
Sensitivity Levels:
0 – Off: Disables impact-based event recording.
1 – Low Impact Detect: Records events for light impacts or vibrations.
5 – Medium Impact Detect [Default]: Balanced sensitivity to detect typical driving
collisions.
9 – High Impact Detect: Only triggers for strong impacts, reducing false recordings from minor movements.
Note: Settings 2–4 and 6–8 offer intermediate sensitivity adjustments between low, medium, and high.
The Parking G-Sensor detects sudden impacts or vibrations while your vehicle is
parked. If triggered, the dashcam automatically records a short video clip, helping
capture or vandalism incidents.
Available Options: 0 (Off), 1–9
Default Setting: 5 (Medium)
Sensitivity Levels:
0 – Off: Disables impact detection during parking mode.
1 – Low Impact Detect: Triggers recording only for minor taps or light movement.
5 – Medium Impact Detect (Default): Balanced setting to detect typical bumps or door
dings.
9 – High Impact Detect: Highly sensitive; records even slight vibrations or knocks.
The 24-HR Auto Parking Mode ensures your vehicle stays protected even when parked. It activates automatically when the engine is turned off and records critical footage in case of impact or motion detection. When triggered by an impact the dashcam turnson, records a 1-minute video, locks the footage to prevent overwriting, and powers off. G-Sensor sensitivity can be adjusted in settings to suit your environment.
Available Options:
Off (Default)
Time-Lapse 1fps & G-Sensor
Motion Detection & G-Sensor
Auto Turn Off & G-Sensor
Note: 3-lead Hardwiring Kit is required (can be purchased separately)
Time-Lapse 1fps & G-Sensor:
When this mode is active and the hardwiring kit is connected:
Turning off the ignition stops regular recording and activates 1fps time-lapse recording.
If the G-sensor detects an impact:
The camera exits time-lapse mode.
Records a 1-minute real-time video.
Saves it in the Event folder.
Returns to time-lapse mode.
This feature temporarily hides on-screen icons for an unobstructed live view.
App Options: Off (Default) / 1 min / 3 min / 5 min
Speed Unit : Choose your preferred unit for speed display. App Options: MPH / KM/H (Default)
Live Speed: Enables real-time speed display on the screen. App Options: On (Default) / Off
This feature allows you to flip front camera footage if mounted upside down.
App Options: On (Default) / Off
Wi-fi
ADAS (Advanced Driver Assistance Systems)
Date/Time
Date Format
Clock Format
Screen Saver Settings
Voice Guidance
License Plate Entry
GPS Info
Storage Space
Format
Default Setting
Frimware Version
Beep Sound
Speaker Volume
Boot up Tone
Voice Control
Voice Command
When on, the screen displays the device name and password (12345678).
Keep your phone within 3 metres of the dashcam to control it via the HiveCam app and view live video.
While Wi-Fi is active, physical buttons will not respond.
To exit Wi-Fi Mode, press and hold the middle emergency button.
ADAS (Advanced Driver Assistance Systems) enhances your driving safety by using
AI-powered features to alert you to potential hazards.
Options: Off (default)/On
Once enabled, your dashcam will provide real-time alerts through the following modes:
Open Assist Drive CAL: Calibrate your camera view by aligning the on-screen guide lines with your vehicle’s lane and hood to ensure accurate ADAS alerts.
Lane Departure Warning: Triggers an alert when your vehicle drifts out of its lane without using a turn signal.
Front Car Movement: Detects and informs when the Car in front starts movement.
Front Car Collision Warning: Detects and warns you of potential collisions with vehicles or obstacles ahead.
Note: This feature may engage emergency braking in supported vehicle systems.
ADAS Initiation Process
Turn on the device and go to “ADAS” >> “Open Assist Drive CAL”.
Let the calibration dashed line aligned (The horizontal calibration dashed line is for segmentation to half sky, half land; the vertical calibration dashed line need to be located in the middle of the road where the car is located); then, install the dashcam on the windshield.
Drive the car above 30 Km/h speed. And try to maintain straight driving as much as possible.
Device will note, “Assisted driving calibration starts”.
If ADAS is calibrated successfully then device will note, “Assisted driving calibration succeeded”, else it will note, “Assisted driving calibration failed, please re-calibrate as required”.
Date/ Time: Press [Menu] to enter settings. Use [UP]/[DOWN] to adjust time. Press [OK] to confirm.
Date Format: Adjust the date display on your dashcam to suit your preference. App Options: YYYY-MM-DD / MM-DD-YYYY / DD-MM-YYYY (default).
Clock Format: Adjust the time display on your dashcam to suit your preference.
- 12 Hours (default): Displays time with AM/PM (e.g., 08:30 PM).
- 24 Hours: Displays time in military format (e.g., 20:30)
This feature configures how the dashcam screen behaves during periods of inactivity.
Live Video Always On: Screen stays on with live view. Screen Saver ON After 1 min (default): Shows only time and speed after 1 minute of inactivity.
On (Default): Spoken prompts and alerts
Off: Silent notifications
This feature allows you to embed your vehicle’s license plate number into recorded videos. Follow the steps below to enter the licence plate number:
Navigate through characters using the [UP] and [DOWN] buttons.
Press [M] after each character to confirm and move to the next.
After completing your plate number, press [OK] to save the entry.
Once saved, your license plate number will be watermarked on all recorded videos.
The GPS Info screen allows you to view real-time geographic and movement data captured by your dashcam’s built-in GPS module. Delineated are the details displayed as GPS info:
Coordinates (Latitude & Longitude): Shows your current position in degrees.
Speed: Indicates your current driving speed.
Direction: Displays the vehicle’s orientation (e.g., North, South).
Satellite Number: Shows the number of GPS satellites connected.
Time: Displays the GPS-synced time for accurate timestamping.
GPS Format : Choose how location data appears in video file metadata or on-screen GPS display.
Decimal Degrees: Example – Latitude: 12.9716, Longitude: 77.5946
Degrees, Minutes, Seconds (Default): Example – Latitude: 12°58′16′′, Longitude: 77°38′59′′
When the voice control feature is turned ON, you can speak specific voice commands to control various dashcam functions without pressing any buttons. Refer to the table below for voice command options:
Voice Command | Function |
Show front camera | Switches the display to the front camera view |
Show rear camera | Switches the display to the rear camera view |
Turn on screen | Turns on the display screen |
Turn off screen | Turns off the display screen |
Take picture | Captures a still photo |
Lock the video | Locks the current video recording to prevent it from being overwritten. |
Turn on audio | Enables microphone audio recording |
Turn off audio | Disables microphone audio recording |
Turn on Wi-fi | Activates WiFi to connect with the smartphone app |
Turn off Wi-fi | Deactivates WiFi functionality |
Note: Ensure your voice is clear and avoid background noise for better recognition.
Storage Space: Displays total, free, event, normal, and photo memory usage.
Format: Delete all the SD card data here.
Default Setting: Restore all system settings to factory default here.
In the system stettings, go to Firmware Version to check your dashcam’s current firmware here.
Screen Saver OFF After 1 min: Screen turns off, but recording continues.
Note: Screen always on uses more power & may overheat. In heat, use Black Screen Mode (LCD OFF), recording continues with less heat.
Beep Sound: Enables or disables keypress sounds. Options: On (Default) / Off
Speaker Volume: Adjusts playback audio volume. Options: Low / Medium / High / Off
Boot up Tone: On (default): Plays a tone when the device powers on ; Off: Starts silently.
Voice Control: Voice Control enables hands-free operation of your dashcam through predefined
commands. Available Options: On (Default) / Off
Wi-Fi Direct connection allows real-time video access in the boAt HiveCam app. Refer to the steps below to proceed.
Open the boAt HiveCam App: Once connected, your dashcam model will appear on the screen. Tap Check Real-Time Video to open the live preview window.
Go to Live Video Preview > Tap on Snapshot > Snapshot will be saved to Device Albums > Photos Tab
Stop recording → Go to “Device Album” in app → Select the file → Tap on Trim option on selected video → Download files → Saved under “Downloaded Files
Offline Maps are available exclusively on Android devices. When the smartphone is connected to the dashcam Wi-Fi, the mobile network is disabled. In such cases, users can use downloaded maps for navigation.
Steps to download the offline maps: From App Home > Profile > Offline Maps > Download Offline Maps
The Hive Dashcam M1 allows the Micro SD card to be formatted directly through the system settings or using the Wi-Fi Key.
Format via System Settings:
Go to Dashcam Settings > System Settings > Format SD Card.
Confirm the action to format the card.
Restarting the dashcam after formatting is recommended.
Once formatting is complete, it is recommended to restart the dashcam (optional) to ensure changes are applied properly.
Format with the Wi-Fi Key: Press and hold the Wi-Fi Key for 8 seconds until a confirmation sound is heard.
Note: For optimal performance, format the Micro SD card periodically (e.g., every 1 to 2 months), if used frequently.
The boAt HiveCam app lets you access, preview, and download your dashcam’s
recorded media with ease.
Stop Recording First: Before downloading, ensure that the ongoing recording is stopped by tapping the Stop icon on the Live Video Preview screen.
Access Playback Mode: Tap on Dashcam Albums at the bottom of the screen to enter the playback section.
Navigate Files: You can view your recorded files through two tabs:
Timeline: Displays recordings arranged chronologically, highlighting video types using color codes – Green (Normal Video), Red (Emergency Video), Yellow (Parking Monitoring), and Purple (Time-lapse Video).
List: Displays recordings by date (e.g., 2025-10-15, 2025-10-14) along with recorded events and captured photos for quick access.
View Saved Media: Access your downloaded files under the Downloaded Files section within the app.
Preview Videos: Tap any video thumbnail to preview it before downloading.
Download Selected Files:
Tap the Select option and choose the desired files.
Tap the Download icon (downward arrow) located at the bottom of the screen.
The app will display a Downloading progress screen showing the percentage and file count (e.g., 1/1).
Wait until the download completes. The video will be saved under Downloaded Files within the app.
Downloaded Files: View all saved videos, events, photos directly from this section for easy playback or sharing.
Snapshot: Capture still images from the live video preview or during playback.
Audio Recording: Enable or disable microphone audio capture during video recording.
Switch Camera: Switch between front and rear camera views.
Fold: Collapse or expand certain display sections within the app.

